RaspberryPylot: putting it all together and everything seems to be working.
[flv width=”600″ height=”370″]http://tim.jagenberg.info/files/2012/09/PTIM3123.mp4[/flv]
PTIM3123.mp4

vague but exciting …
Science and technology revolutionise our lives, but memory, tradition and myth frame our response.
RaspberryPylot: putting it all together and everything seems to be working.
[flv width=”600″ height=”370″]http://tim.jagenberg.info/files/2012/09/PTIM3123.mp4[/flv]
PTIM3123.mp4
The EasyStar II airframe is ready for the first flight. As I’m still implementing the MAVLink protocol for the RaspberryPi remote control (RaspberryPylot), the first flight will be a traditional RC flight. I hope my (very) old mc-17 is still up for this!
I’m working on using the Raspberry Pi as a remote control replacement. The “chain of command” goes as follows:
USB-Gamepad > Laptop >TP-WN722NC
~~~802.11n~~~
TP-WN722NC > Raspberry Pi > I2C > PCA9685 > Servos & Motor Controller
So far so good, everything seems to be working with acceptable low latency. I’ll just need to code some security measures, if the signal is lost (motor off and servos positioned for a slight turn).
As the last weeks were rather busy and I was stuck with a bad cough, I’m still not completely finished with the Easy Star II. As the Raspberry Pi won’t fit completely into the fuselage, I’ll have to adapt the canopy for it:
As my Adafruit “16-Channel 12-bit PWM/Servo Driver – I2C interface” arrived today, I got me a Breadboard and all necessary utensils (including a little I2C temperature sensor for first tries) from the local electronics store. I haven’t been playing with hardware in a looong time, so I’m really looking forward to this.
After soldering a I2C connector for the Raspberry GPIO port it was a quick breeze to set everything up and use i2cget to find out that it is 23degC in my livingroom 🙂
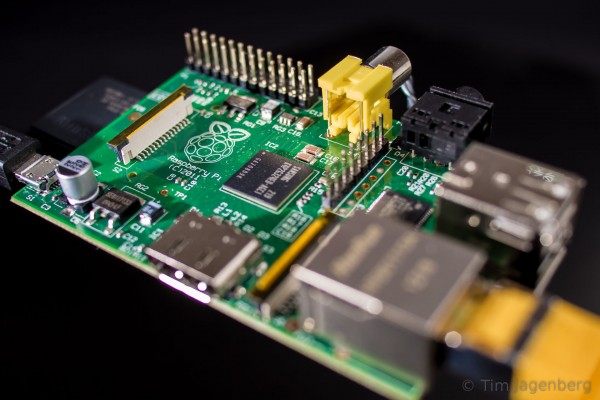
After ordering quite a while ago, my Raspberry Pi arrived last week:

The Raspberry Pi is tiny but complete ARM architecture based single-board computer with the power comparable to a two-year-old smart-phone. Insert an SD card as a hard-drive and you’re ready to go!
There are two things I have in mind with this little fella: An XBMC based media centre or a Raspberry Pi controlled model car. The former I already tested using Linux based distributions like OpenELEC or RaspBMC, the latter will require an additional board, interfacing the Raspberry Pi with PWM based model servos via I2C. Luckily Adafruit is supplying exactly that: “16-Channel 12-bit PWM/Servo Driver – I2C interface”
Let’s see where things go with the RPi-Rover 🙂
A brief overview of the recent press coverage regarding the amazing Chaos Comunication Camp 2011 in Finowfurt: