DIY Minimal Leather Wallet

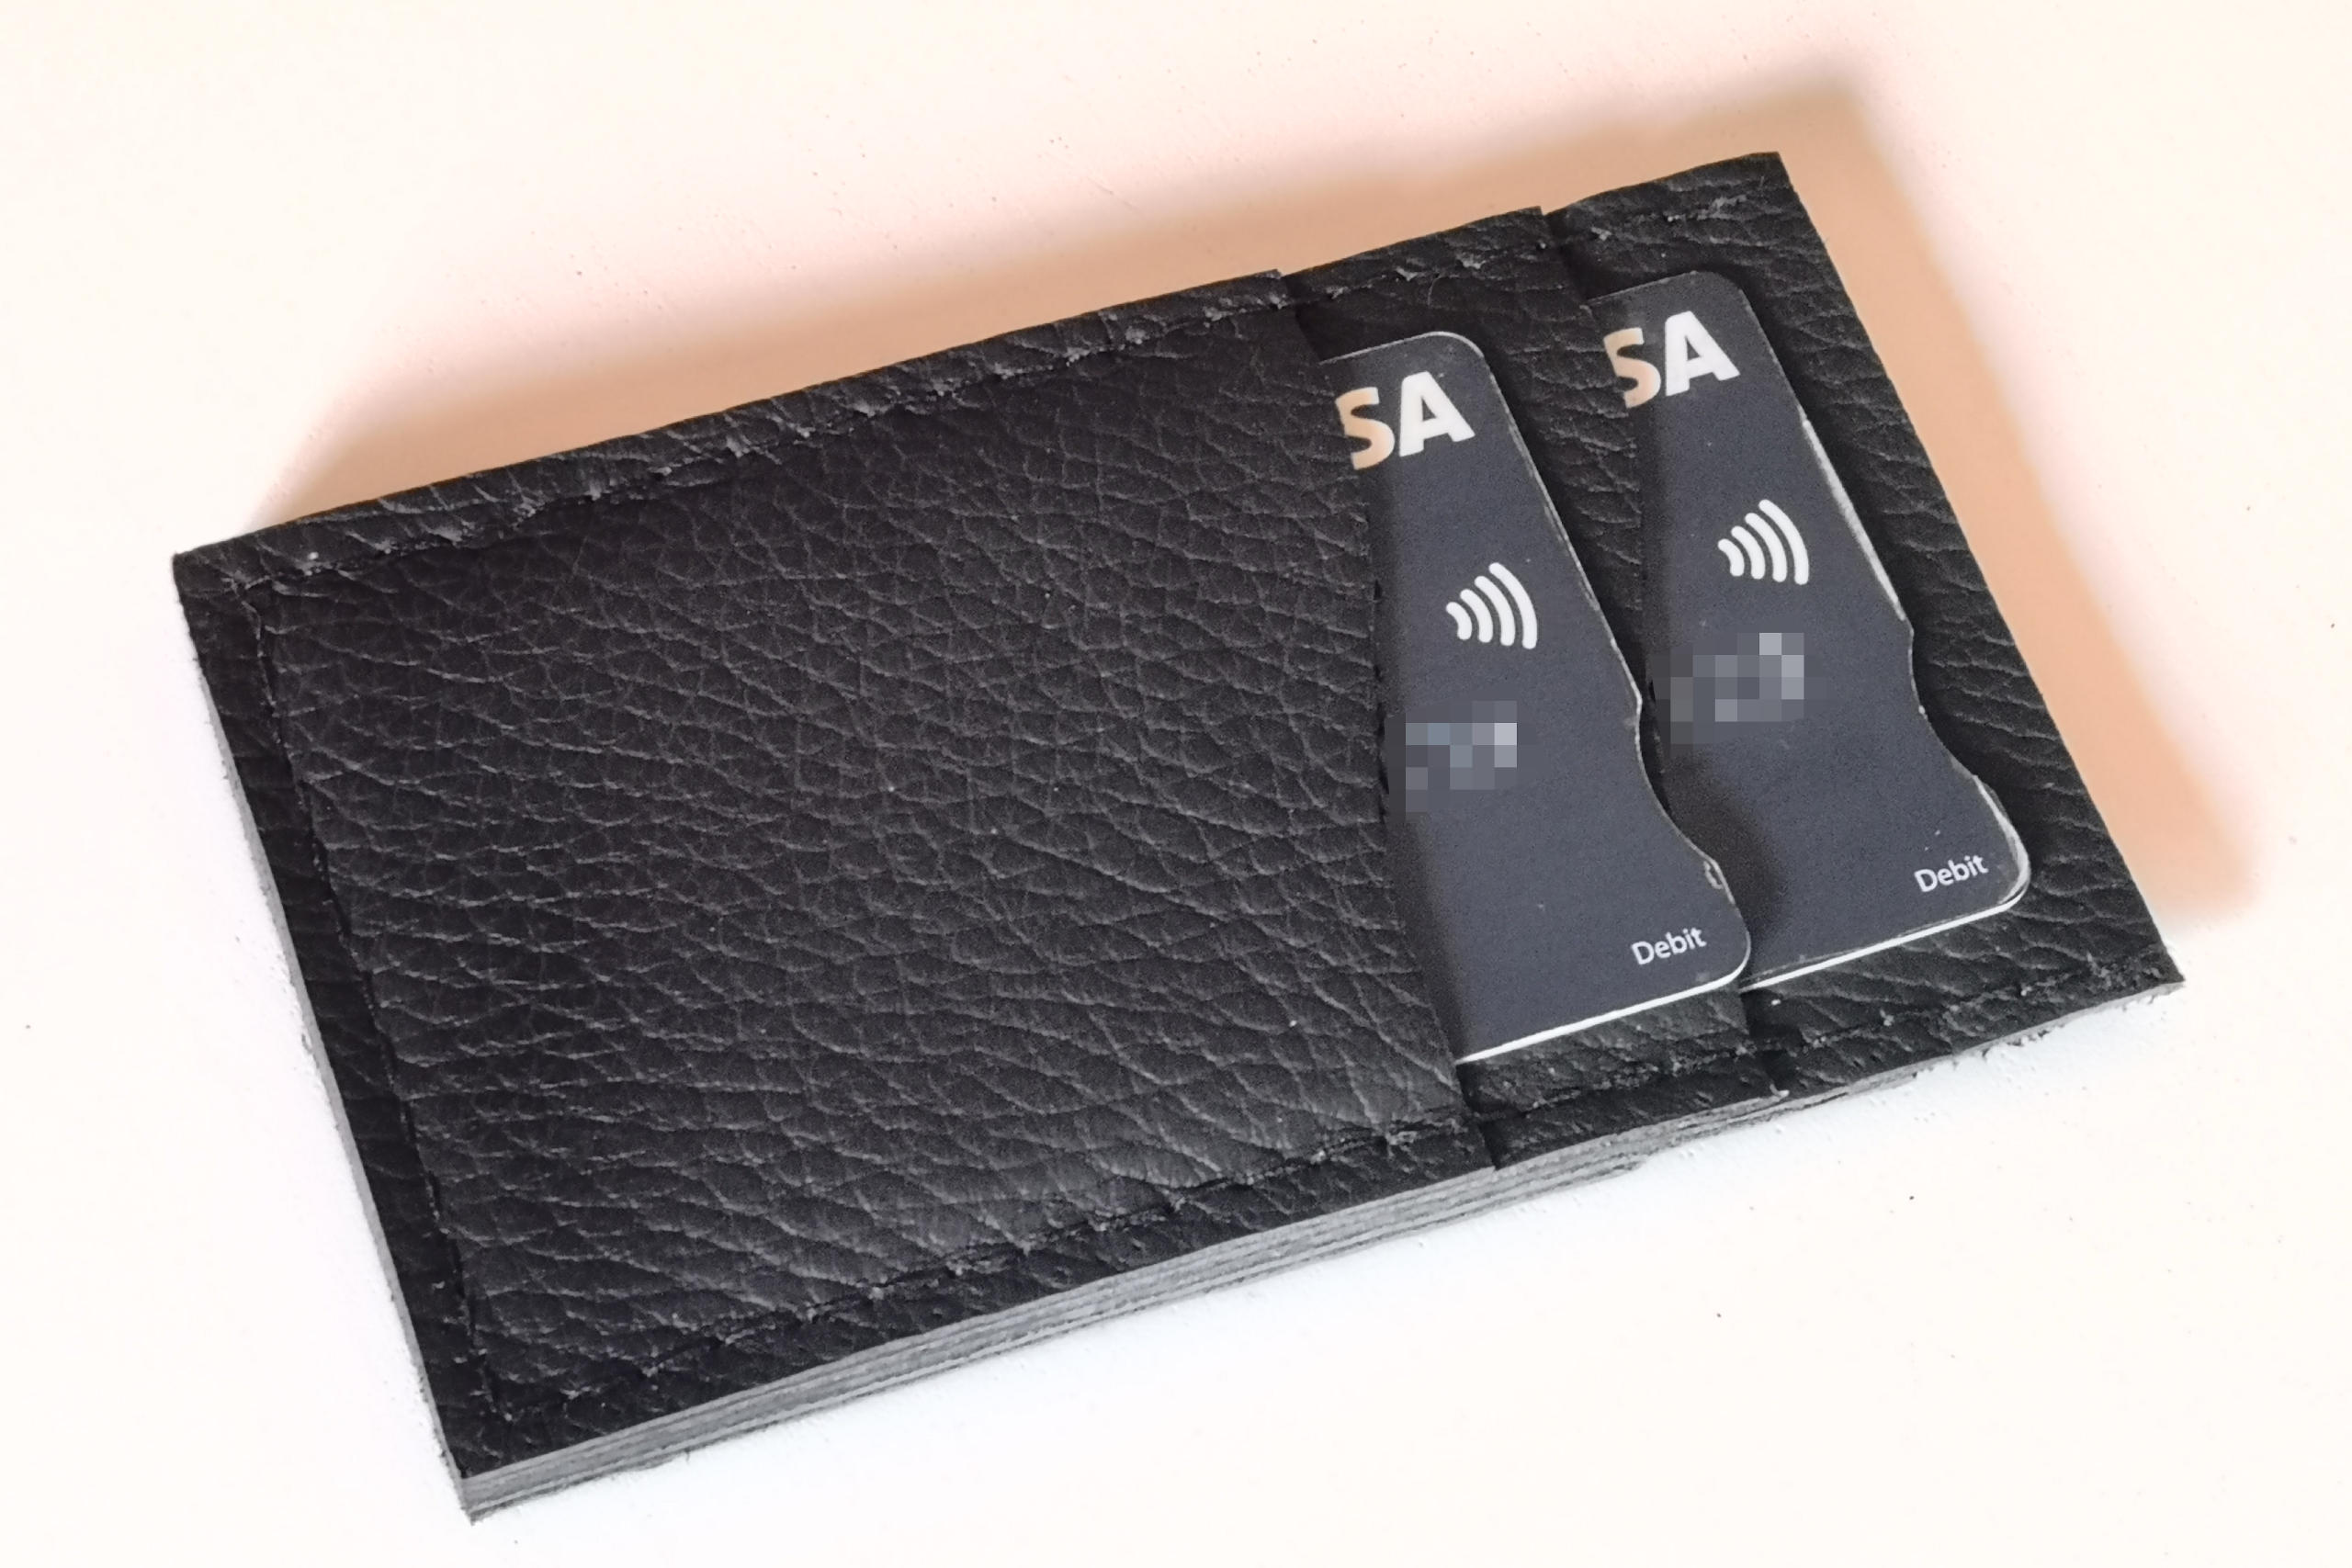
As I took two months of holidays between jobs during summer, I finally had time for a little handcrafts project: A minimal leather wallet for the few cards I usually carry with me. Norway is basically cash-free, so there is no need for coin or bill compartments.

DIY Minimal Leather Wallet

I first needed to find a place where I could get smaller pieces of suitable leather. As it turned out, the only shop with a decent selection was a cute little furniture restoration place near the city centre. Aside the beautiful but amazingly expensive full cow-sides, there also was a little box of various leather left-overs:

Box of leather left-overs

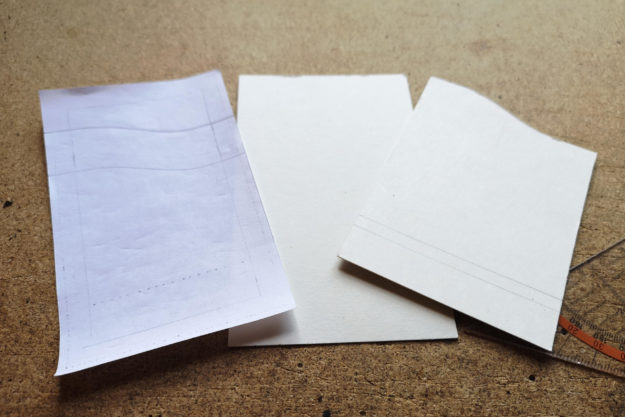
I drafted the design on paper and cut the pieces to shape with a bit of extra space around the seam so I could later cut off a millimetre to get a clean finish. To secure the parts into place, I glued the two inner pockets to the central piece along the edges, adding two thick books for even pressure. To keep the inner card from slipping too far in, I machine-sewed a later hidden stitch of 2cm length across the pockets. After this I glued the outer pockets in place and let everything dry for a night.
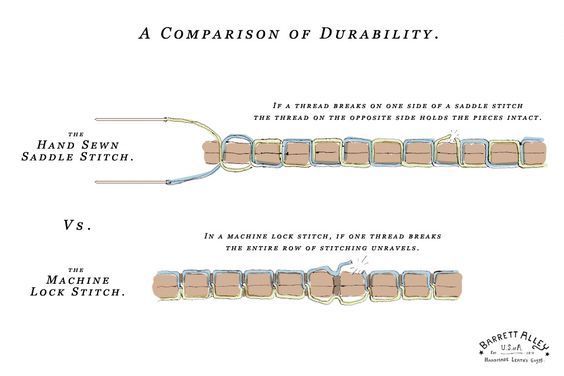
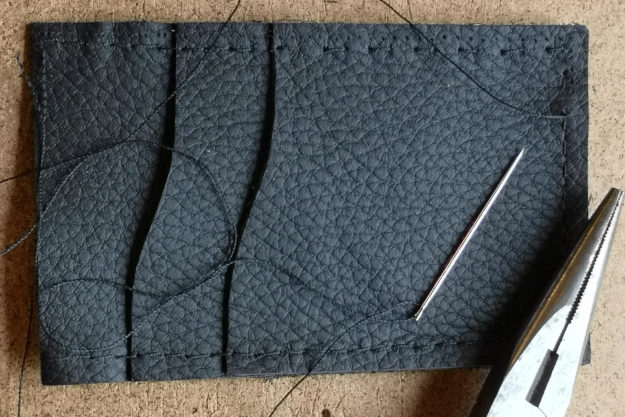
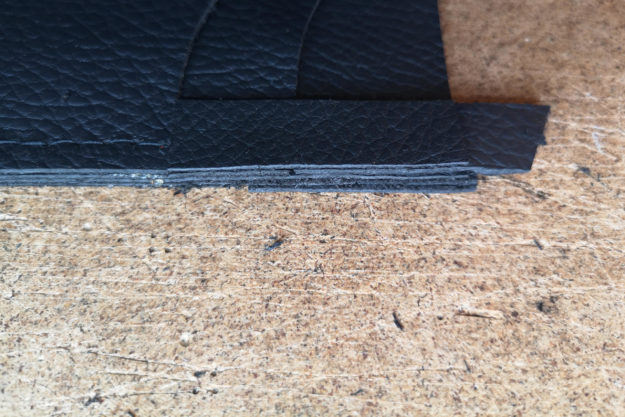
With a stitching awl I prepared the holes about 4mm from the edges with 5mm spacing (this was the easier choice, but next time I might go down to 3-4mm spacing). Using a hand-sewn saddle stitch pattern with an extra durable upholstery thread, I joined the pieces together.

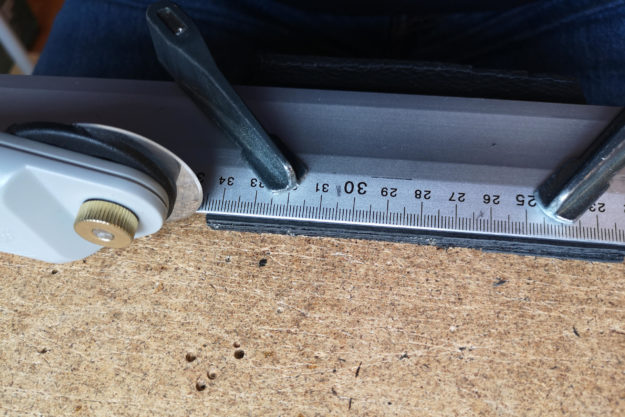
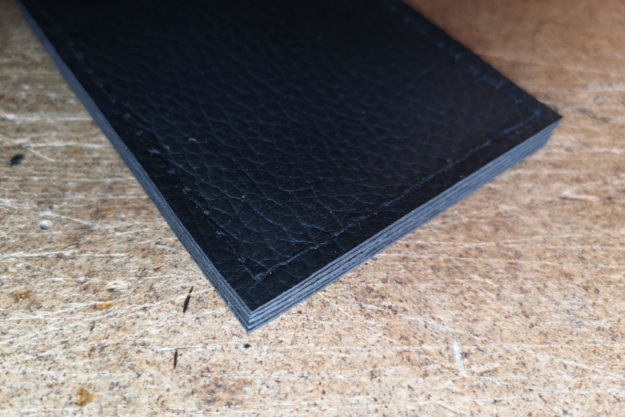
For the final cleaning cut, I supported all sides with little leftover pieces in order to get even thickness and a proper grip for clamping it down with a ruler. Once the leather was properly secured in place and aligned, I cut off about 1mm along all edges with a rotary cutter.

Let’s how this one holds up to daily use. I already have some other designs in mind, I will just need to find the time for it. 😀

Last Year in Review

A lot of time has passed since my last update and much as happened. I will briefly and mostly visually summarise the key events:

September – Jervfjellet Hike

A few years back, a friend of mine started the Trondheim Outdoor group on Meetup.com in order to organised social hikes. After I joined a few times, she asked me to join in with organising hikes and we decided to split the task between us; she focused on the family friendly Sunday hikes, while I focused more on the adventurous activities. While I could be more active than I actually am, I still manage some continuity, so in September I organised a two-day-hike with camping up on Jervfjellet, behind Jonsvatnet.


September – Freediving on SkÃ¥røya

Another friend of mine had been telling me how amazing free-diving here in the area is, so summer ’17 I finally gave in, bought the gear, and joined him diving. And how right he was! I joined the Trondheim Fridykkerklubb for their trip to SkÃ¥røya, a small and island at the edge of Hitra, one of the bigger islands at the coast near Trondheim. With about 40 free-divers we stayed in an old school building on the island and had all the kayaks, row-boats, and even a motor-boat with skipper at our disposal. With the autumn-weather on our side, we had the most amazing free-diving weekend!


October – Visiting Family in Hamburg

Strolling through the city, modern art, and poetry slam.


November – Well You Know …

December – Julehygge


The Taste of Summer

This weekend I made two nice sirups from plants in my garden, spruce shoots and dandelion. 

Both recipes are essentially the same. Collect spruce shoots or dandelion flowers (only the yellow petals), put in a pot, cover with water, boil for 30 minutes, pour mass through a sieve into another pot and weigh, add 2/3 of weight sugar, slowly boil to a slightly viscous consistency, and finally fill into bottles. For better durability, I boil the slightly opened bottles in a half full water-bath for about 30 minutes.

Water Droplets

Finally found the time to take a few shots of colorful stuff under a glasspane with water droplets:

A Hot Tea and a Good Book


… enjoy the end of a long day.

My submission for the weekly photo challenge at PhotoFriday.com, you can find it as entry #204.

The Setup

Overall I used three flashes, two YN560 and one FL-36R:

  • A DIY salad-bowl beauty-dish with grid provided the overhead main light, casting some soft shadows.
  • One flash was positioned behind the glass and shaded in a way, so it only hit the steam above the glass.
  • The last flash had a make-shift double-slottet blind, providing a narrow accent light from the front:


Colourful Things

Just some new photos:

I wanted to take these photos for a while, so today I just popped around the corner to the hardware store and got me a set of colourful pencils. While I was there I stumbled over those coloured spatulas and got them as well.

Cheers
Tim

Strobist Photography

After years of “available light only”, I’m recently discovering the additional freedom of strobist or flash photography. See below the results of my first tries:


Let me know what you think!
Tim