12V to USB Charging Converter

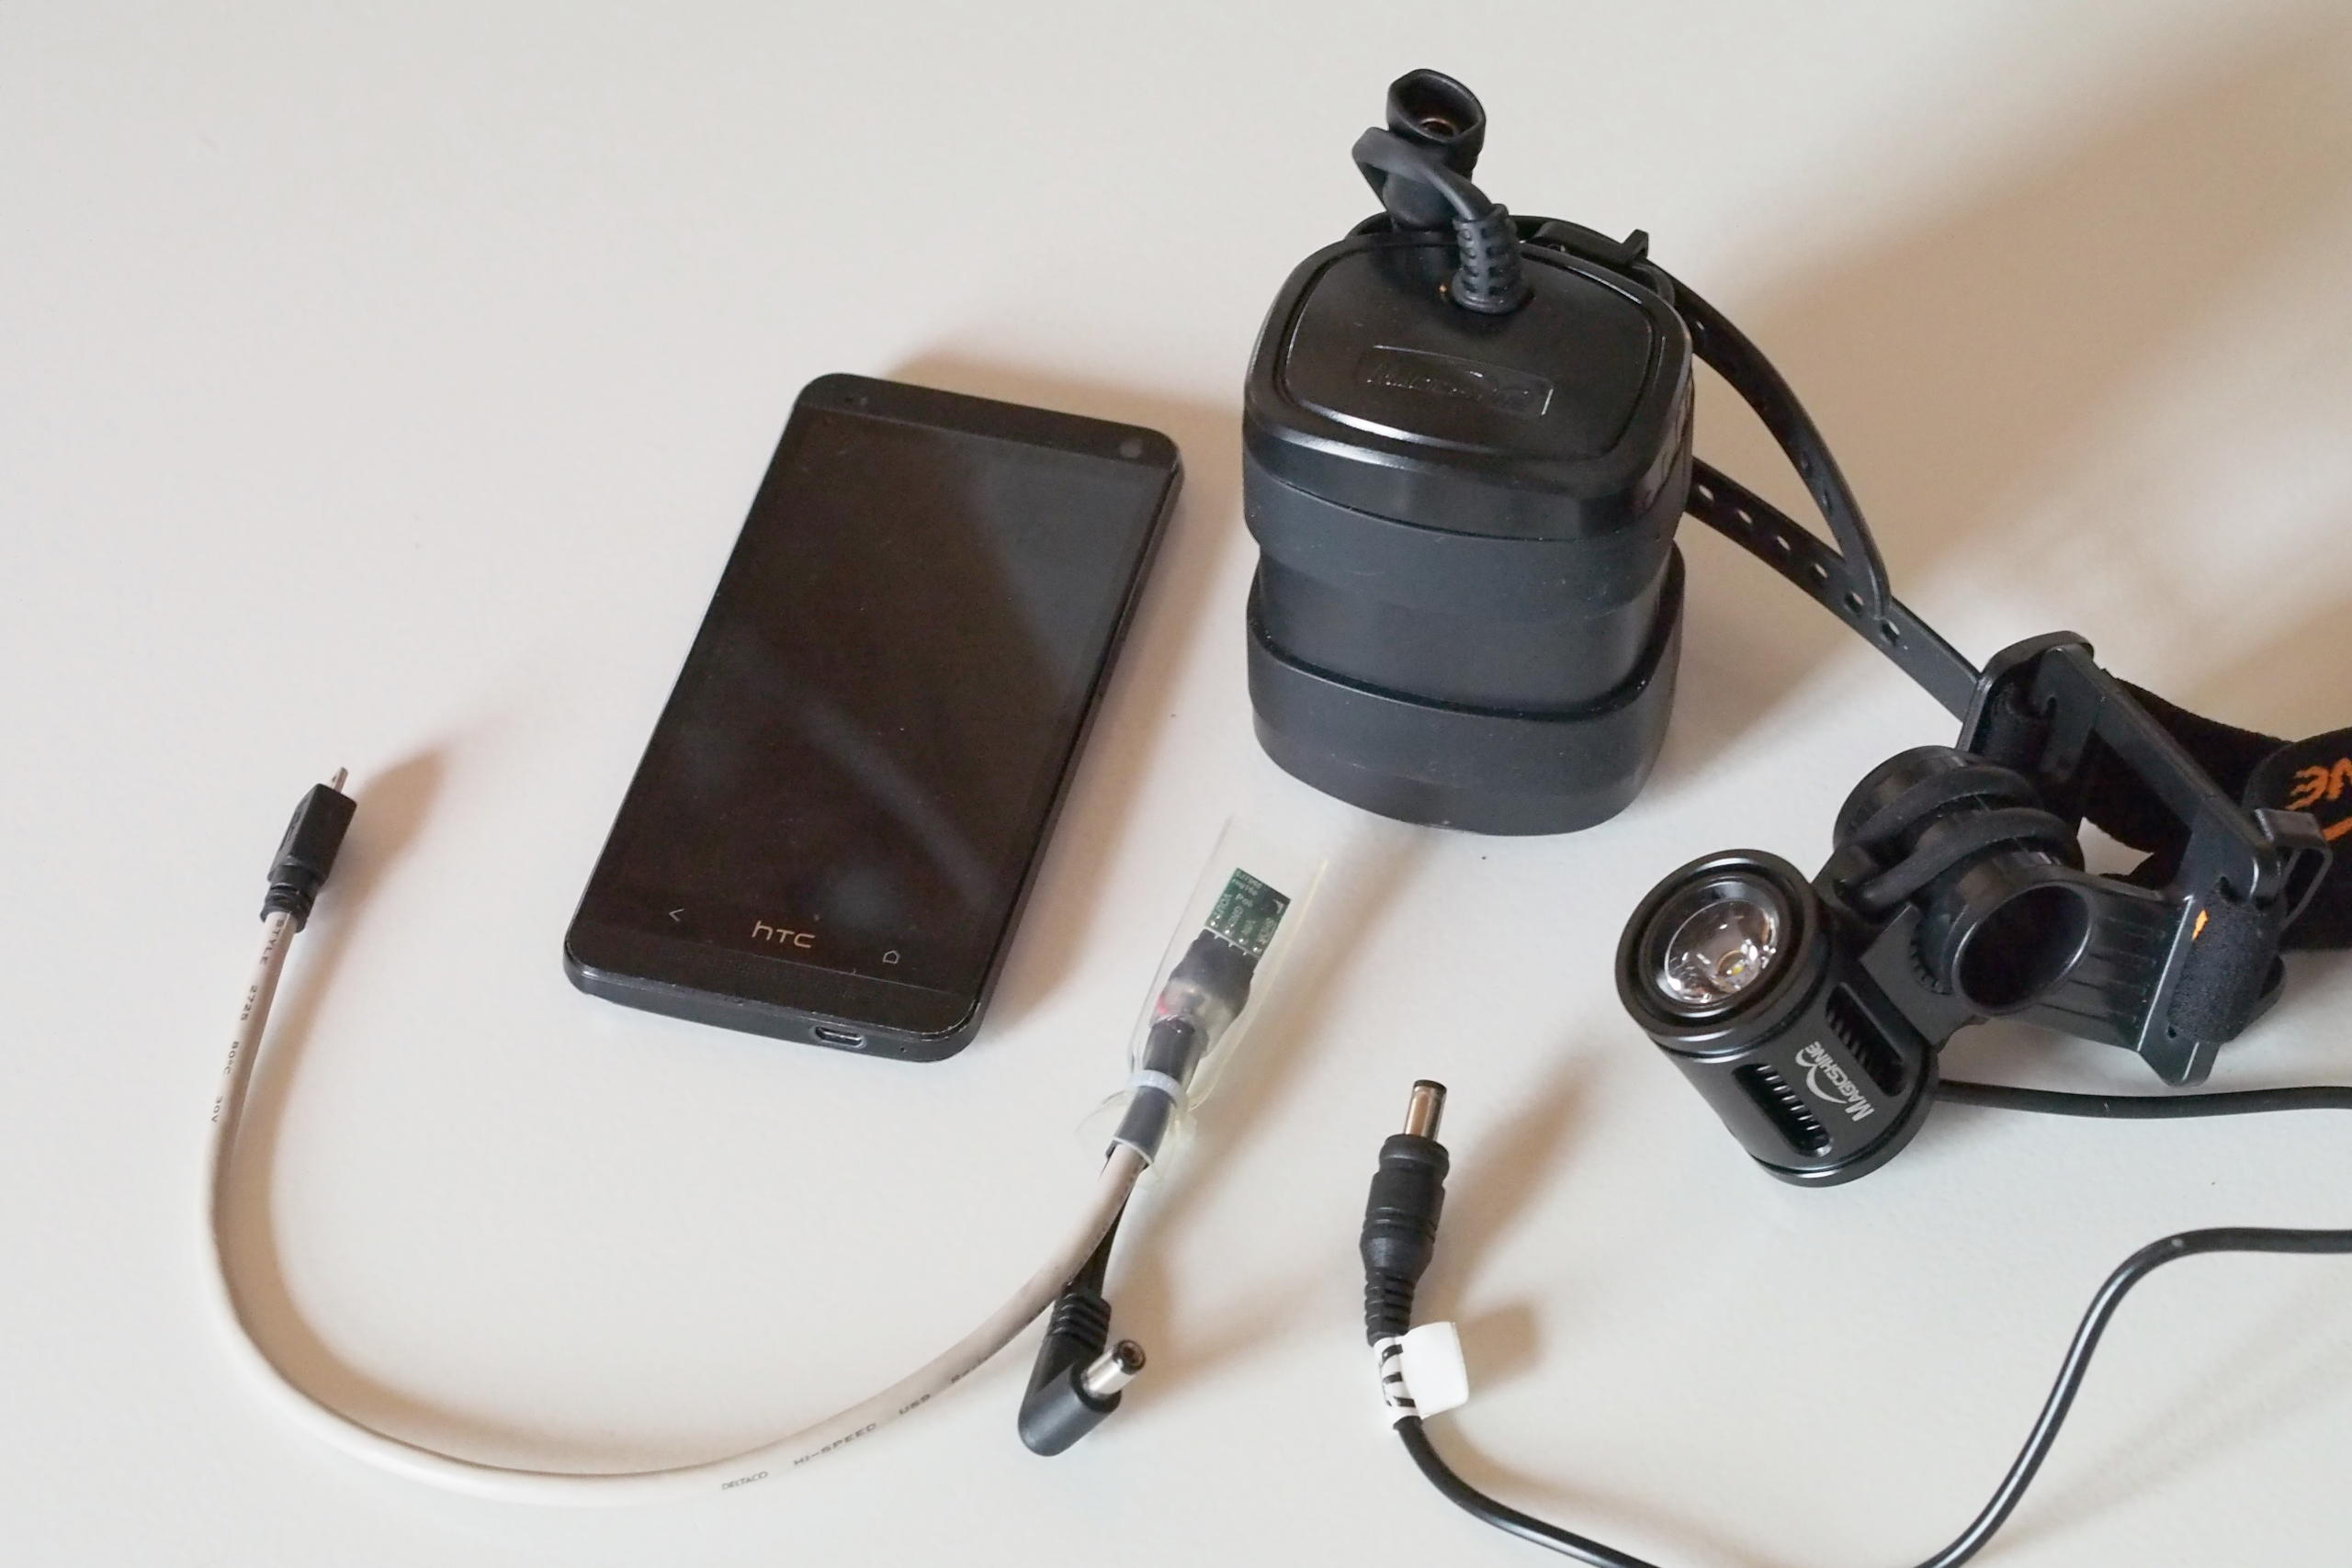
After the USB charging converter for my headlight battery packs worked really well last weekend (I got two full charges from one battery pack), I decided to quickly implement a simple 12V to USB charging hack I had in mind for quite some time.

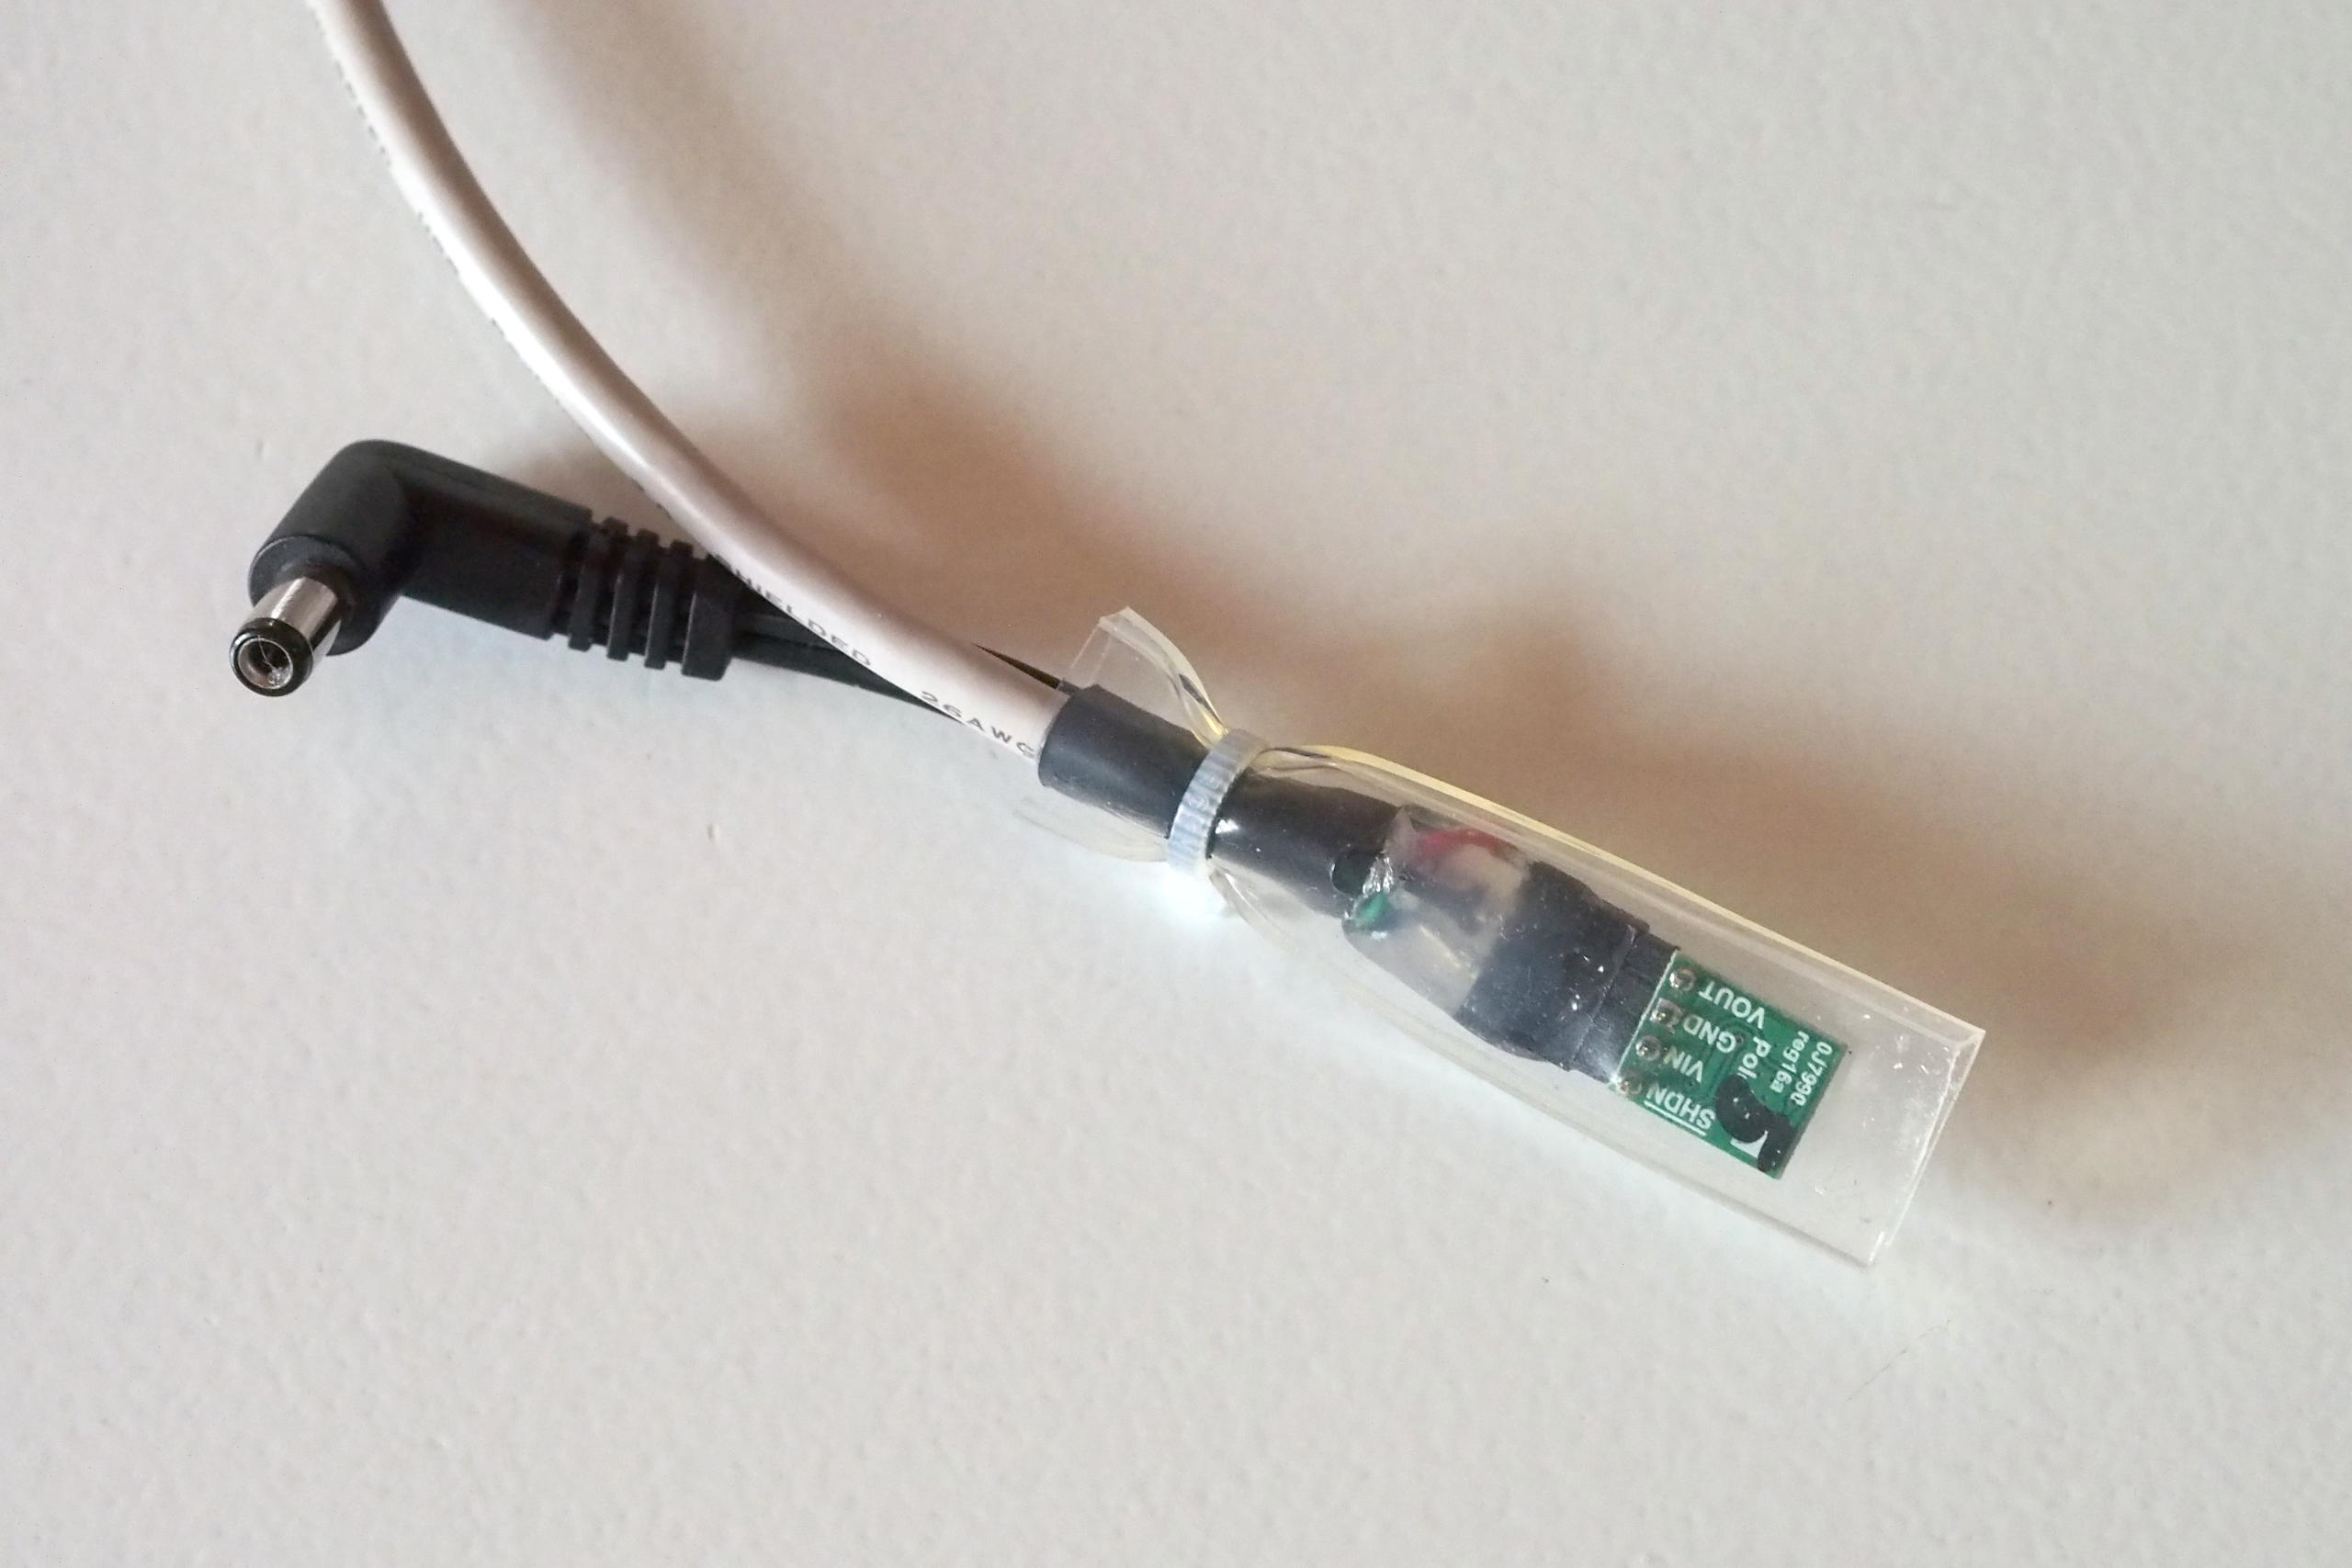
On one of the recent hikes between huts I realised that some of the huts in Norway have solar panel powered 12V power supply. I’ve had a spare car-cigarette-lighter to USB adapter for quite some time and decided to replace the plug with generic crocodile clamps which are more versatile. With these new contacts, I can now attach to any 12V source to recharge USB appliances. For a little protection, I secured the leads with hot glue and covered the circuit board with a bit of yellow shrink tube.

12V to USB Charging Adapter

Headlight-Battery Phone Charging Adapter

As I’m heading out for a three day snow-shoe hike with friends tomorrow, I quickly hacked an adapter which enables me to charge my phone from my headlight LiPo batteries. This way I don’t need an additional backup for my phone.

In one of my junk-boxes I found a 5.5mm plug which matches the batteries. For the phone end I simply cut some left-over micro-USB cable. I wired it all up with a 5V 500mA Step-Down Voltage Regulator from Pololu and insulated my beautiful soldering job with heaps of hot glue and a silicone cover from an LED strip 😀

DIY Headlight-Battery Phone Charger

DIY ESP8266EX Breadboard Adapter

Today I received the ESP8266EX Serial -> WiFi modules! After not being convinced by the rather expensive Adafruit TI CC3000 (35USD!) module I am now very curious about these tiny and cheap (<4USD) modules.

As their default header (2X4 male) is not exactly breadboard friendly, I sat down today and soldered a simple breadboard adapter. All you need is a tiny piece of stripboard 4×4, two male headers 1×4, two female headers 1×4 or one female header 2×4, and a bit of hot glue.

use the male headers to stbilise the female header place the strip-board on the female header solder the female header to the strip-board

  • Cut the stripboard to the correct size (4×4) and sandpaper any rough edges. Use a file to separate the copper strips across the middle.
  • Place the female header on a breadboard using the male headers to give it some stability and solder it to the stripboard. Watch out for the correct orientation!

re-aligned male header reverse inserted male headers solder the male headers

  • Re-align the plastic spacer of the male headers all the way to the top.
  • Place the stripboard with the male headers inserted from the non-copper side on some support (I used my vice for this).
  • Solder the male headers to the stripboard.

plastic spacer on the bottom side hot glue around the male header tips DIY breadboard adapter for the ESP8266

  • Now replace the plastic spacer of the male headers to the bottom side and push it as far up as possible (it probably will not go all the way because of the solder)
  • Add some hot glue around the tips of the male headers to provide additional support and strength.
  • Voilà!

The first tests using the Bus Pirate as UART bridge worked fine. I could talk to the module and connect to my home WiFi via WPA2.